Explainer: Bucket Wear Patterns and When to Replace
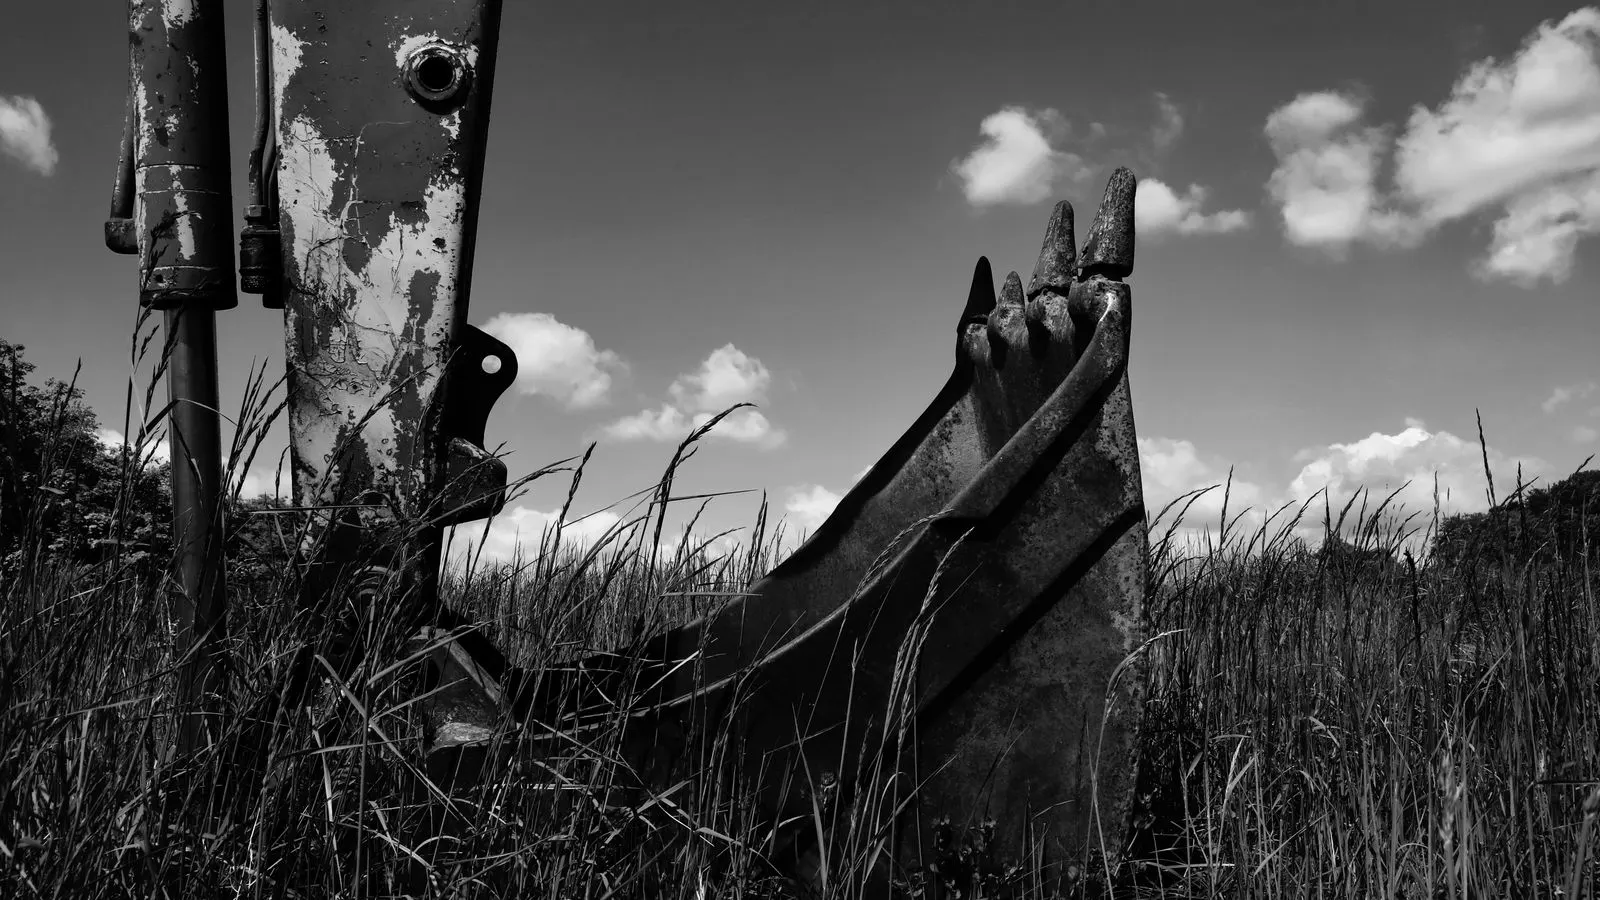
This guide explains how to read bucket wear patterns to determine replacement timing. It covers common wear types, inspection methods, and sourcing decisions. It includes a practical example of identifying lip damage on a standard excavator bucket to plan part replacement.
- Inspect bucket lips, cutting edges, and wear plates to identify specific wear patterns.
- Track maintenance intervals by logging inspection dates and visible damage levels.
- Match replacement parts to the exact wear pattern to avoid costly errors.
- A standard bucket with a broken lip often needs a full replacement over a repair.
- Sourcing decisions depend on the material, cut, and attachment type of the worn part.
What bucket wear actually looks like
Bucket wear is the loss of material from an excavator bucket caused by digging, scraping, or impact. The damage is not always uniform. A heavy rock digger may wear the cutting edge first, while a soil bucket may wear the lip and the sides near the pivot. Understanding the pattern tells you what the bucket was doing, what it can still do, and what part needs replacing.
Wear shows up in three main areas. The cutting edge is the thin strip of hardened steel along the bottom. The lip is the leading edge that scrapes soil or rock. The wear plate is a bolted-on section on the side or bottom that takes the most abrasive force. When one area fails, the other areas usually follow.
In a standard soil bucket, the lip is often the first point of failure. The operator sees the bucket taking soil less efficiently, and the machine feels heavier on the swing. The metal on the lip has thinned into a rounded shape. The cutting edge below it may still be sharp. This separation between lip wear and edge wear is common. The lip takes the initial contact with the ground. The edge takes the final cut. If the lip fails before the edge, the bucket is likely being used in a way that favors scraping over cutting.
The wear plate is a different story. It is designed to take abuse. It sits on the bottom or side, bolted to the bucket body. When the plate wears through, the base metal is exposed. This is a critical failure point. The base is softer than the plate. Once the plate is gone, the base wears rapidly. A cracked plate does not just lose material. It loses structural integrity. The bucket can split at the crack. This is why inspecting the plate is more than checking for thickness. You are checking for stress fractures that start small and grow.
How to identify specific wear patterns
Each wear pattern points to a different cause. Reading the pattern helps you choose the right part.
- Cutting edge failure. The bottom edge thins or breaks. This happens when the machine digs hard rock or abrasive soil. The cut is usually a straight line along the bottom. The metal often shows a shiny, polished surface. This polish comes from friction. If the edge has snapped, the break is usually jagged. The remaining edge is shorter than the original length. This reduces the effective cutting width. The operator feels the bucket slipping on the cut.
- Lip wear. The leading edge rounds off or develops a V-shaped groove. This happens when the bucket scrapes the ground or cuts through soft earth. The wear follows the curve of the bucket. A V-groove is a strong indicator of excessive scraping. The bucket is being held at an angle that drags the lip across the surface. The metal in the groove is smooth. The sides of the groove are sharp. This indicates a consistent, repeated force.
- Wear plate damage. The bolted plate cracks, bends, or pulls away from the base. This happens when the bucket hits hard objects or when the bolts loosen. The damage is often localized to the plate. A bent plate changes the geometry of the bucket. It may prevent the bucket from closing properly. It may cause uneven wear on the sides. A cracked plate is dangerous. The crack can propagate across the bucket base during the next digging cycle.
- Side chafing. The inner walls thin out. This happens when the bucket rubs against itself or the boom during digging cycles. The wear is on the inside surfaces. This is often caused by the operator holding the bucket at too wide an angle. The bucket swings against the boom or the counterweight. The metal shavings accumulate in the hinge area. This adds weight and changes the balance.
- Pivot wear. The hinge points lose thickness. This happens when the bucket flexes under load. The wear is on the curved metal around the pins. The pins themselves may wear down. The bushings may crack. When the pivot wears, the bucket does not close fully. The operator has to use the stick to force it shut. This puts extra stress on the cylinder and the linkage.
Each pattern affects the part you buy. A worn cutting edge may need a replacement edge or a new bucket. A worn lip may need a lip repair or a full bucket. A damaged wear plate may need a new plate and bolts. Misidentifying the pattern leads to the wrong part. A lip repair on a bucket with a cracked base will fail quickly. A new cutting edge on a bucket with severe pivot wear will not fix the underlying problem.
Maintenance intervals and inspection checks
Maintenance intervals are the planned time or work periods between inspections. For buckets, the interval depends on the material being moved and the machine’s duty cycle. A machine digging soft soil may need a visual check every two weeks. A machine digging rock may need a check every shift. The interval is not just about wear. It is about safety. A cracked bucket can fail without warning. A loose bolt can throw a plate into the operator’s cab.
The inspection should cover the whole bucket. Look for the following:
- Thickness of the cutting edge.
- Shape of the lip.
- Condition of the wear plate and bolts.
- Cracks in the base or sides.
- Wear on the pivot points.
- Debris trapped in the bucket that can hide damage.
Use a feeler gauge or a straight edge to check thickness. The gauge tells you if the metal is thin enough to fail. The straight edge shows if the lip is still flat. If the lip has a gap when the straight edge is placed across it, the lip is worn. The gap is the amount of metal lost. For a rock bucket, the gap should be minimal. For a soil bucket, a larger gap is acceptable until the cutting efficiency drops.
Check the bolts on the wear plate. Tighten them if they are loose. Replace them if the threads are stripped. The bolts should be the correct grade. A low-grade bolt can snap under the load of the plate. The plate should sit flush against the base. If there is a gap, the base is worn. This is a sign of advanced wear.
Cracks are the most dangerous sign. Look for hairline cracks in the base, the sides, and the lip. Use a mirror to check the back of the plate. A crack on the back is harder to see. It is often caused by impact. A crack that looks small on the surface may be deep inside. This is why a professional inspection is useful. They use dye penetrant or other methods to find hidden flaws.
Log the findings. A simple note with the date, machine ID, and observed damage level helps you track wear over time. When the wear reaches a certain level, you plan the replacement. This prevents unexpected downtime and makes sourcing easier. The log is your history. It shows how fast the bucket is wearing. It helps you predict when the next replacement is needed.
Part replacement and sourcing decisions
Part replacement depends on the severity of the wear and the part you need. Sourcing decisions involve matching the part to the machine and the wear pattern.
| Wear Pattern | Typical Part Needed | Sourcing Consideration |
|---|---|---|
| Thinned cutting edge | Cutting edge bar or new bucket | Check edge material and cut profile |
| Rounded lip | Lip repair kit or new bucket | Match lip curve and thickness |
| Cracked wear plate | Wear plate and bolts | Confirm plate material and bolt size |
| Broken pivot pin | Pivot pin and bushing | Check pin diameter and material |
| General thinning | New bucket | Match full bucket geometry and weight |
The table shows how wear maps to parts. For example, if the cutting edge is thin but the rest of the bucket is sound, you may buy just the edge. If the lip is badly worn and the base is cracked, you will likely buy a new bucket. The decision is not just about cost. It is about value. A cheap part that fails in a month is more expensive than a good part that lasts a year.
Sourcing also depends on the attachment type. A standard soil bucket has a different cut than a rock bucket. A rock bucket has a thicker base and a reinforced edge. A general purpose bucket sits between the two. Buying the wrong type can cause early failure. A soil bucket on rock will lose its edge quickly. A rock bucket on soil will not cut well. It will drag and wear the lip.
When you order a part, provide the machine model, the bucket type, and the wear pattern. The supplier can match the part to the machine. This reduces errors and ensures a proper fit. Do not just buy a bucket by model number. Check the dimensions. Check the pin diameter. Check the bolt pattern. A part that fits the model number may not fit the specific attachment.
Worked example: Identifying lip damage
A machine operator notices the bucket is not cutting as well as before. The operator inspects the bucket and finds the lip is rounded into a V-shape. The cutting edge is still thick. The wear plate is intact.
The operator measures the lip width and compares it to the original. The lip has lost a significant amount of metal. The V-shape indicates the bucket was scraping the ground, not just cutting. The operator logs the wear in the maintenance log.
The operator decides a lip repair is not worth it because the lip is too thin to weld a new strip. The operator orders a new bucket with the same lip profile. The new bucket arrives, and the operator installs it. The machine returns to normal cutting.
This example shows how a specific wear pattern leads to a part replacement decision. The operator did not guess. They read the damage, logged it, and chose the right part. The operator also considered the cost. A lip repair might have saved money in the short term. But it would have failed quickly. The operator chose the part that would last.
Common mistakes that shorten bucket life
Several mistakes accelerate wear. Using the wrong bucket for the job is the biggest one. A soft soil bucket used on rock will fail quickly. A rock bucket used on soft soil will not cut well and will wear the lip.
Other mistakes include:
- Not checking the wear plate bolts.
- Ignoring small cracks until they become large.
- Using the bucket as a lever to lift objects.
- Not cleaning debris from the bucket before inspection.
- Not logging wear patterns.
Each mistake adds stress to the bucket. The result is earlier failure and higher replacement costs. Using the bucket as a lever is a common error. The operator sees an object that is hard to move. They hook the bucket around it and pull. The bucket flexes. The lip bends. The pivot wears. This puts stress on the machine’s hydraulic system. The cylinder has to work harder. The hoses wear faster. The pump runs hotter.
Ignoring small cracks is dangerous. A crack that looks like a scratch may be a stress fracture. It can grow under load. The bucket can fail in seconds. This can cause serious injury. Always inspect for cracks. If you see one, stop using the bucket. Get it inspected.
Not cleaning debris is a common oversight. Soil and rock build up in the bucket. This hides damage. It adds weight. It changes the balance. The operator thinks the bucket is fine because they cannot see the wear. Clean the bucket before inspection. Use a brush or a pick to remove debris. Look at the metal.
Not logging wear patterns means you are flying blind. You do not know when the bucket will fail. You do not know how fast it is wearing. You do not know if the machine is being used correctly. The log is your record. Use it.
Planning replacements to avoid downtime
Planning replacements means predicting when the bucket will fail. You can do this by tracking wear over time. If the lip loses a certain amount of metal every month, you can predict when it will need a new bucket.
Keep a log. Record the date, the machine, and the condition of each part. Use the log to order parts before the bucket fails. This keeps the machine working and avoids emergency sourcing.
When you order a new bucket, provide the machine model, the bucket type, and the wear pattern. The supplier can match the part to the machine. This reduces errors and ensures a proper fit.
Planning also helps with budgeting. You can set aside funds for part replacement instead of spending it on an emergency. This is better for cash flow and for the machine’s overall life.
Final thoughts
Bucket wear is a signal. It tells you what the machine is doing and what part needs attention. By inspecting regularly, logging the findings, and matching the right part to the wear pattern, you can plan replacements and keep the machine working.
The key is to read the damage. Do not guess. Look at the lip, the edge, and the wear plate. Use the information to make a sourcing decision. This is how professional operators keep their buckets in good shape.
Frequently asked questions
How often should I inspect an excavator bucket?
Inspect the bucket after every shift for heavy rock work. For soft soil work, inspect it every two weeks. Look for changes in the lip, edge, and wear plate.
Can I repair a worn bucket instead of replacing it?
Yes, if the damage is minor. A thin cutting edge or a small lip wear may be repaired with a weld or a replacement edge. If the base is cracked or the lip is very thin, a new bucket is usually better.
What is the best way to log bucket wear?
Use a simple log with the date, machine ID, and a note on the condition of each part. Take photos of the damage. This helps you track the wear over time.
How do I know if I need a new bucket or just a part?
Check the whole bucket. If only the cutting edge or wear plate is damaged, buy that part. If the lip, base, or sides are badly worn, buy a new bucket.
Does the type of material I dig affect bucket wear?
Yes. Rock and abrasive soil cause faster wear than soft earth. Use the right bucket for the job to reduce wear. A rock bucket has a thicker base and a reinforced edge.