Monthly Inspection Checklist for Wheel Loaders
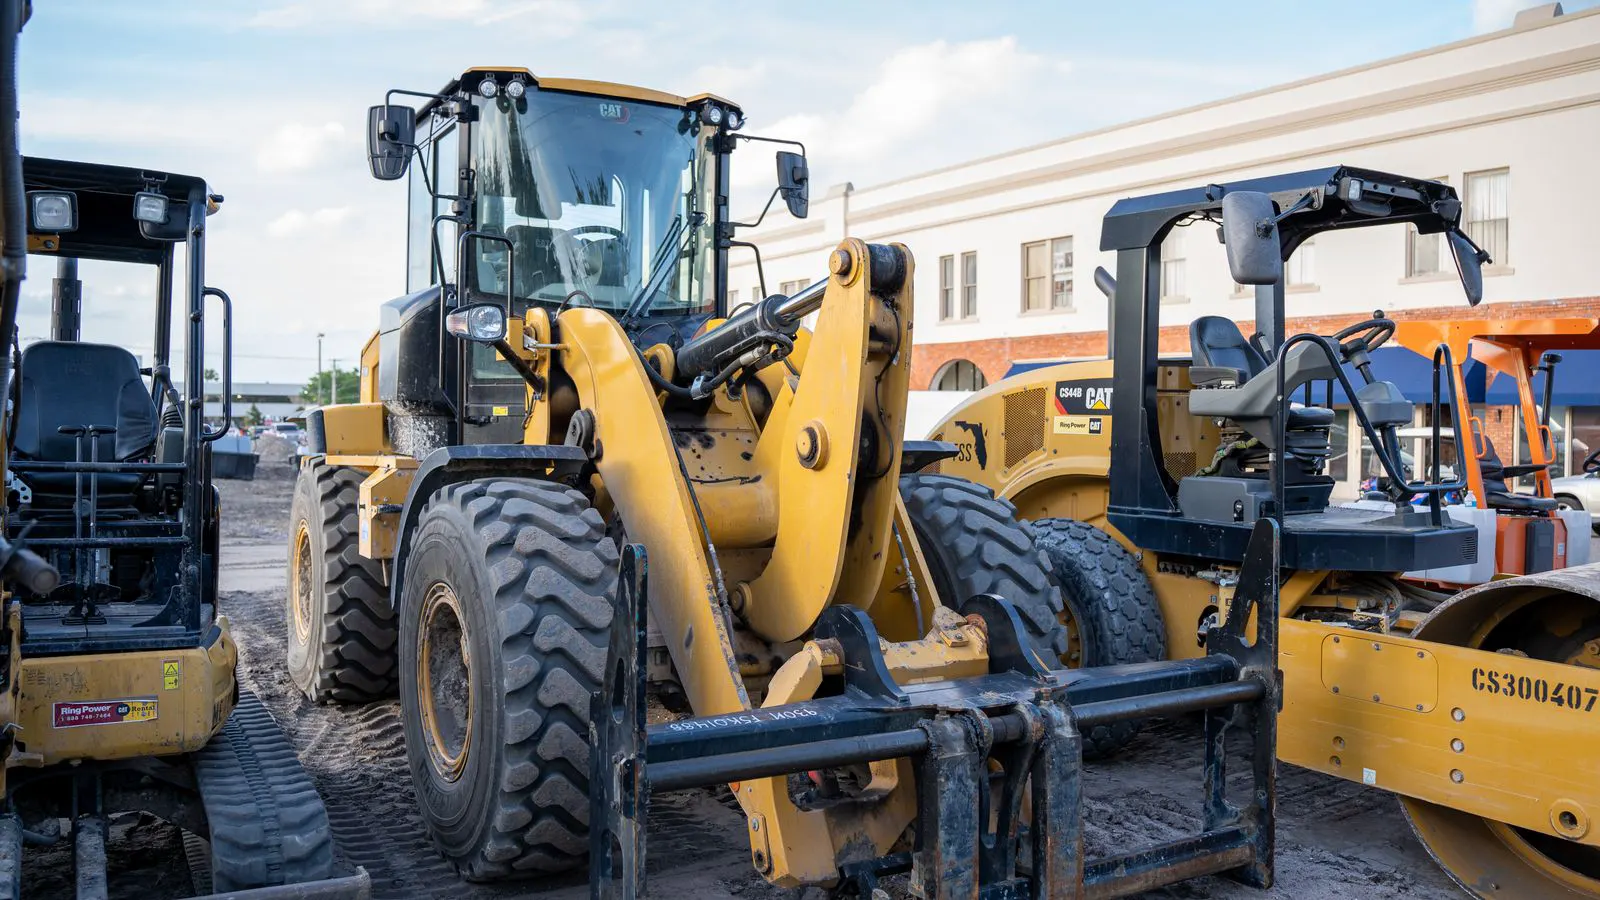
Use this monthly inspection checklist to verify wheel loader safety, hydraulics, tires, and engine condition. It covers critical checks that prevent breakdowns and identify early wear before it becomes expensive.
- A monthly inspection checklist helps catch tire wear, hydraulic leaks, and structural cracks before they cause downtime.
- Focus on safety systems first, then move to hydraulics, tires, and engine components.
- Document findings and track recurring issues to adjust maintenance intervals.
- Red flags include slow lift speed, uneven tire wear, and unexplained oil consumption.
- Keep the checklist accessible to operators and service technicians.
Start with safety systems and structural integrity
Safety checks come first. A wheel loader works under high stress, and small structural failures can become catastrophic quickly. Walk around the machine and inspect the frame, mast, and bucket for cracks. Use a flashlight to check weld points and bolted connections. Look for paint peeling, rust, or metal fatigue around high-load areas.
Check the bucket teeth and cutting edges. Replace or sharpen teeth that are worn down to the root. Dented or bent bucket lips reduce capacity and increase material retention. Verify that the bucket bolts are tight and that the attachment pins are not corroded.
Inspect the overhead guard and cab structure. The overhead guard must remain intact. Check for cracks at the mounting points. Verify that the cab doors, windows, and mirrors are secure. A cracked window or missing mirror creates blind spots that put operators at risk.
Test the horn, lights, and warning beacons. Turn on all exterior lights and confirm they are not fogged or dim. Check the turn signals and flashers. Ensure the horn produces a clear tone. Test the backup alarm if fitted. These items are often overlooked but form the first line of communication on a busy site.
Hydraulics: hoses, cylinders, and fluid condition
Hydraulic failures are among the most common causes of wheel loader downtime. Start with a visual inspection of all hoses. Look for abrasion, chafing, swelling, or exposed wire. Pay attention to areas where hoses rub against the frame or mast. A small leak can develop into a burst hose if left untreated.
Check hydraulic cylinders for weeping or seepage. Wipe the cylinders clean, then run the mast and bucket through their full range. Look for fresh oil on the piston rods and gland seals. Minor weeping may be acceptable if it is controlled, but active dripping requires prompt attention.
Inspect the hydraulic reservoir. Check the fluid level with the engine running and the system at operating temperature. Low fluid levels can indicate leaks or overfilling during previous maintenance. Look for contamination in the sight glass. Water droplets or dark particles signal internal wear or poor filtration.
Test the lift and tilt functions. Raise the bucket to full height and lower it slowly. The movement should be smooth and controlled. Slow lift speed or jerky motion suggests air in the system, worn pump seals, or a failing accumulator. Listen for whining or knocking from the hydraulic pump.
Tires, undercarriage, and wheel bearings
Tire condition affects fuel efficiency, traction, and safety. Check the tread depth on all tires, including the spare. Use a tread gauge to measure the wear in the center and shoulders. Uneven wear patterns indicate alignment problems or consistent over or under inflation.
Verify tire pressure. Check when the tires are cold, before the machine has been operating. Compare readings to the manufacturer’s specification for the current load. Underinflated tires generate excess heat and increase the risk of blowouts. Overinflated tires reduce the contact patch and decrease stability on rough ground.
Inspect the tire sidewalls for cuts, bulges, or embedded debris. Remove any stones or nails that are not already causing a slow leak. Check the wheel hubs and bearings for play. Grasp the tire and rock it side to side. Excessive movement suggests worn bearings. Listen for grinding or rumbling noises while the machine moves.
Examine the axle and brake lines. Look for corrosion or damage to the brake hoses. Check the parking brake mechanism and confirm it holds the machine securely on a slope. A failing parking brake can lead to a runaway loader in a loading area.
Engine, cooling system, and exhaust
Engine checks focus on fluid levels, leaks, and unusual sounds. Start the engine and let it reach operating temperature. Check the engine oil level with the dipstick. The oil should be amber to light brown. Dark oil that smells of fuel indicates dilution, possibly from a failed injector or poor combustion.
Inspect the coolant reservoir. The fluid should be at the correct level and free of oil residue. A milky appearance suggests a head gasket issue or water contamination. Check the radiator and fan shroud for debris, dirt, or damage. A restricted cooling system leads to overheating, especially in hot conditions or during heavy loading cycles.
Listen to the engine at idle. Knocking, ticking, or rough running indicates mechanical problems. Check the air filter housing for cracks or loose clamps. A restricted air filter reduces engine power and increases fuel consumption. Inspect the exhaust system for leaks or cracks. Excessive smoke can point to injector problems or worn piston rings.
Check the fuel system. Look for leaks at the fuel lines, filters, and tank. Verify that the fuel filter indicator shows clean operation. Water in the fuel tank can cause injector damage and engine stalling.
Electrical, controls, and operator station
Electrical faults are often intermittent and harder to diagnose. Check all fuses and circuit breakers. Verify that the battery terminals are clean and tight. Look for corrosion on the positive and negative terminals. A weak battery causes slow cranking and can stress the starter.
Inspect the wiring harnesses for damage. Look for chafing, burnt insulation, or exposed conductors. Pay attention to areas near moving parts or the exhaust. Check the control levers and foot pedals for free movement and proper return. Sticky or sluggish controls affect operator safety and machine performance.
Test the seatbelt. The belt should lock securely and not stretch. A worn or damaged seatbelt reduces injury protection during sudden stops or tip-over events. Check the seat adjustment and confirm the operator can reach all controls without straining.
Inspect the dashboard and gauges. Verify that the temperature, fuel, and hydraulic pressure indicators respond correctly. A faulty gauge can give a false sense of security. Test the alarm and warning lights to ensure they illuminate when the corresponding system is active.
Documentation and follow-up actions
A checklist without records is just a list of actions. Document every inspection. Record the machine ID, date, operator or technician name, and findings. Note any red flags, even minor ones. Track recurring issues over time. If the same tire wears unevenly, investigate the alignment before the next cycle. If hydraulic fluid drops consistently, identify the leak source before it worsens.
Store the checklist in the operator cabin or in a digital log. Make it accessible to all personnel working on the machine. Operators who perform daily checks and technicians who conduct monthly inspections should share the same reference. Consistency in documentation helps identify patterns that point to deeper mechanical problems.
Review the checklist regularly. Equipment conditions change with site conditions, load types, and operating hours. A checklist that worked for light grading may need adjustment for heavy stone handling. Update it as the machine ages or as new wear points appear.
Quick reference: monthly inspection priorities
| Inspection Area | Key Check Points | Common Red Flags |
|---|---|---|
| Structure and Safety | Frame cracks, mast welds, bucket bolts, overhead guard | Cracks, loose bolts, bent bucket, missing guards |
| Hydraulics | Hoses, cylinders, fluid level, leak points, lift speed | Active leaks, slow lift, contaminated fluid |
| Tires and Brakes | Tread depth, pressure, sidewalls, bearing play, parking brake | Uneven wear, bulges, grinding noises, brake failure |
| Engine and Cooling | Oil level, coolant, air filter, exhaust, unusual sounds | Dark oil, smoke, overheating, rough idle |
| Electrical and Controls | Fuses, battery, wiring, levers, seatbelt, gauges | Corrosion, sticky controls, faulty gauges, loose belt |
Common mistakes to avoid during monthly inspections
Skipping the cold tire pressure check leads to inaccurate readings and inconsistent inflation. Many operators check pressure after the machine has been running, which gives a falsely high number. Always wait until the tires have cooled.
Ignoring small hydraulic leaks is a frequent error. A tiny seep at a cylinder gland may seem harmless, but it often indicates a worn seal. Replacing the seal early is cheaper than replacing the cylinder. Similarly, minor structural rust can spread if not treated with a proper sealant or paint.
Failing to test the parking brake is another common oversight. Operators often assume it works because they have not tested it recently. Test it on a gentle slope with the engine off. If the machine rolls, the brake system needs attention.
Not documenting findings creates a knowledge gap. If a technician notices a loose bolt but does not record it, the next person may miss it. A simple note prevents repeat work and helps track parts life.
When to escalate beyond monthly checks
Some issues require immediate attention rather than waiting for the next monthly cycle. A sudden loss of hydraulic pressure, a tire blowout, or a structural crack in the mast should stop operations immediately. These are not items for a checklist. They are safety stops.
If the engine consumes more fuel than usual or produces excessive smoke, do not continue heavy loading. These symptoms often indicate mechanical wear that worsens with use. Pull the machine from service and diagnose the cause before returning it to the site.
Monthly inspections are a maintenance tool, not a guarantee. They reduce the risk of unexpected failure and help maintain operator safety. They do not replace daily operator checks or detailed service intervals. Use the checklist as a baseline and adjust it to match the specific machine and operating environment.
Frequently asked questions
How often should I perform a monthly inspection on a wheel loader?
Once every calendar month or every 100 to 200 operating hours, whichever comes first. Use whichever interval is shorter for high-use machines.
Can the operator perform the entire monthly inspection checklist?
Operators can complete visual checks, fluid levels, and basic functional tests. Hydraulic component replacement, bearing work, and structural repairs should be handled by qualified technicians.
What should I do if I find a red flag during the monthly inspection?
Tag the machine with an out-of-service notice, document the issue, and report it to the maintenance manager. Do not return the machine to service until the problem is resolved.
Is a monthly inspection checklist sufficient for heavy equipment?
It covers routine maintenance, but it does not replace scheduled service intervals. Follow the manufacturer's manual for engine oil changes, filter replacements, and major component inspections.
How should I store the inspection checklist for easy access?
Keep a printed copy in the cab and a digital copy in the maintenance software. Ensure all operators and technicians have access to the current version.